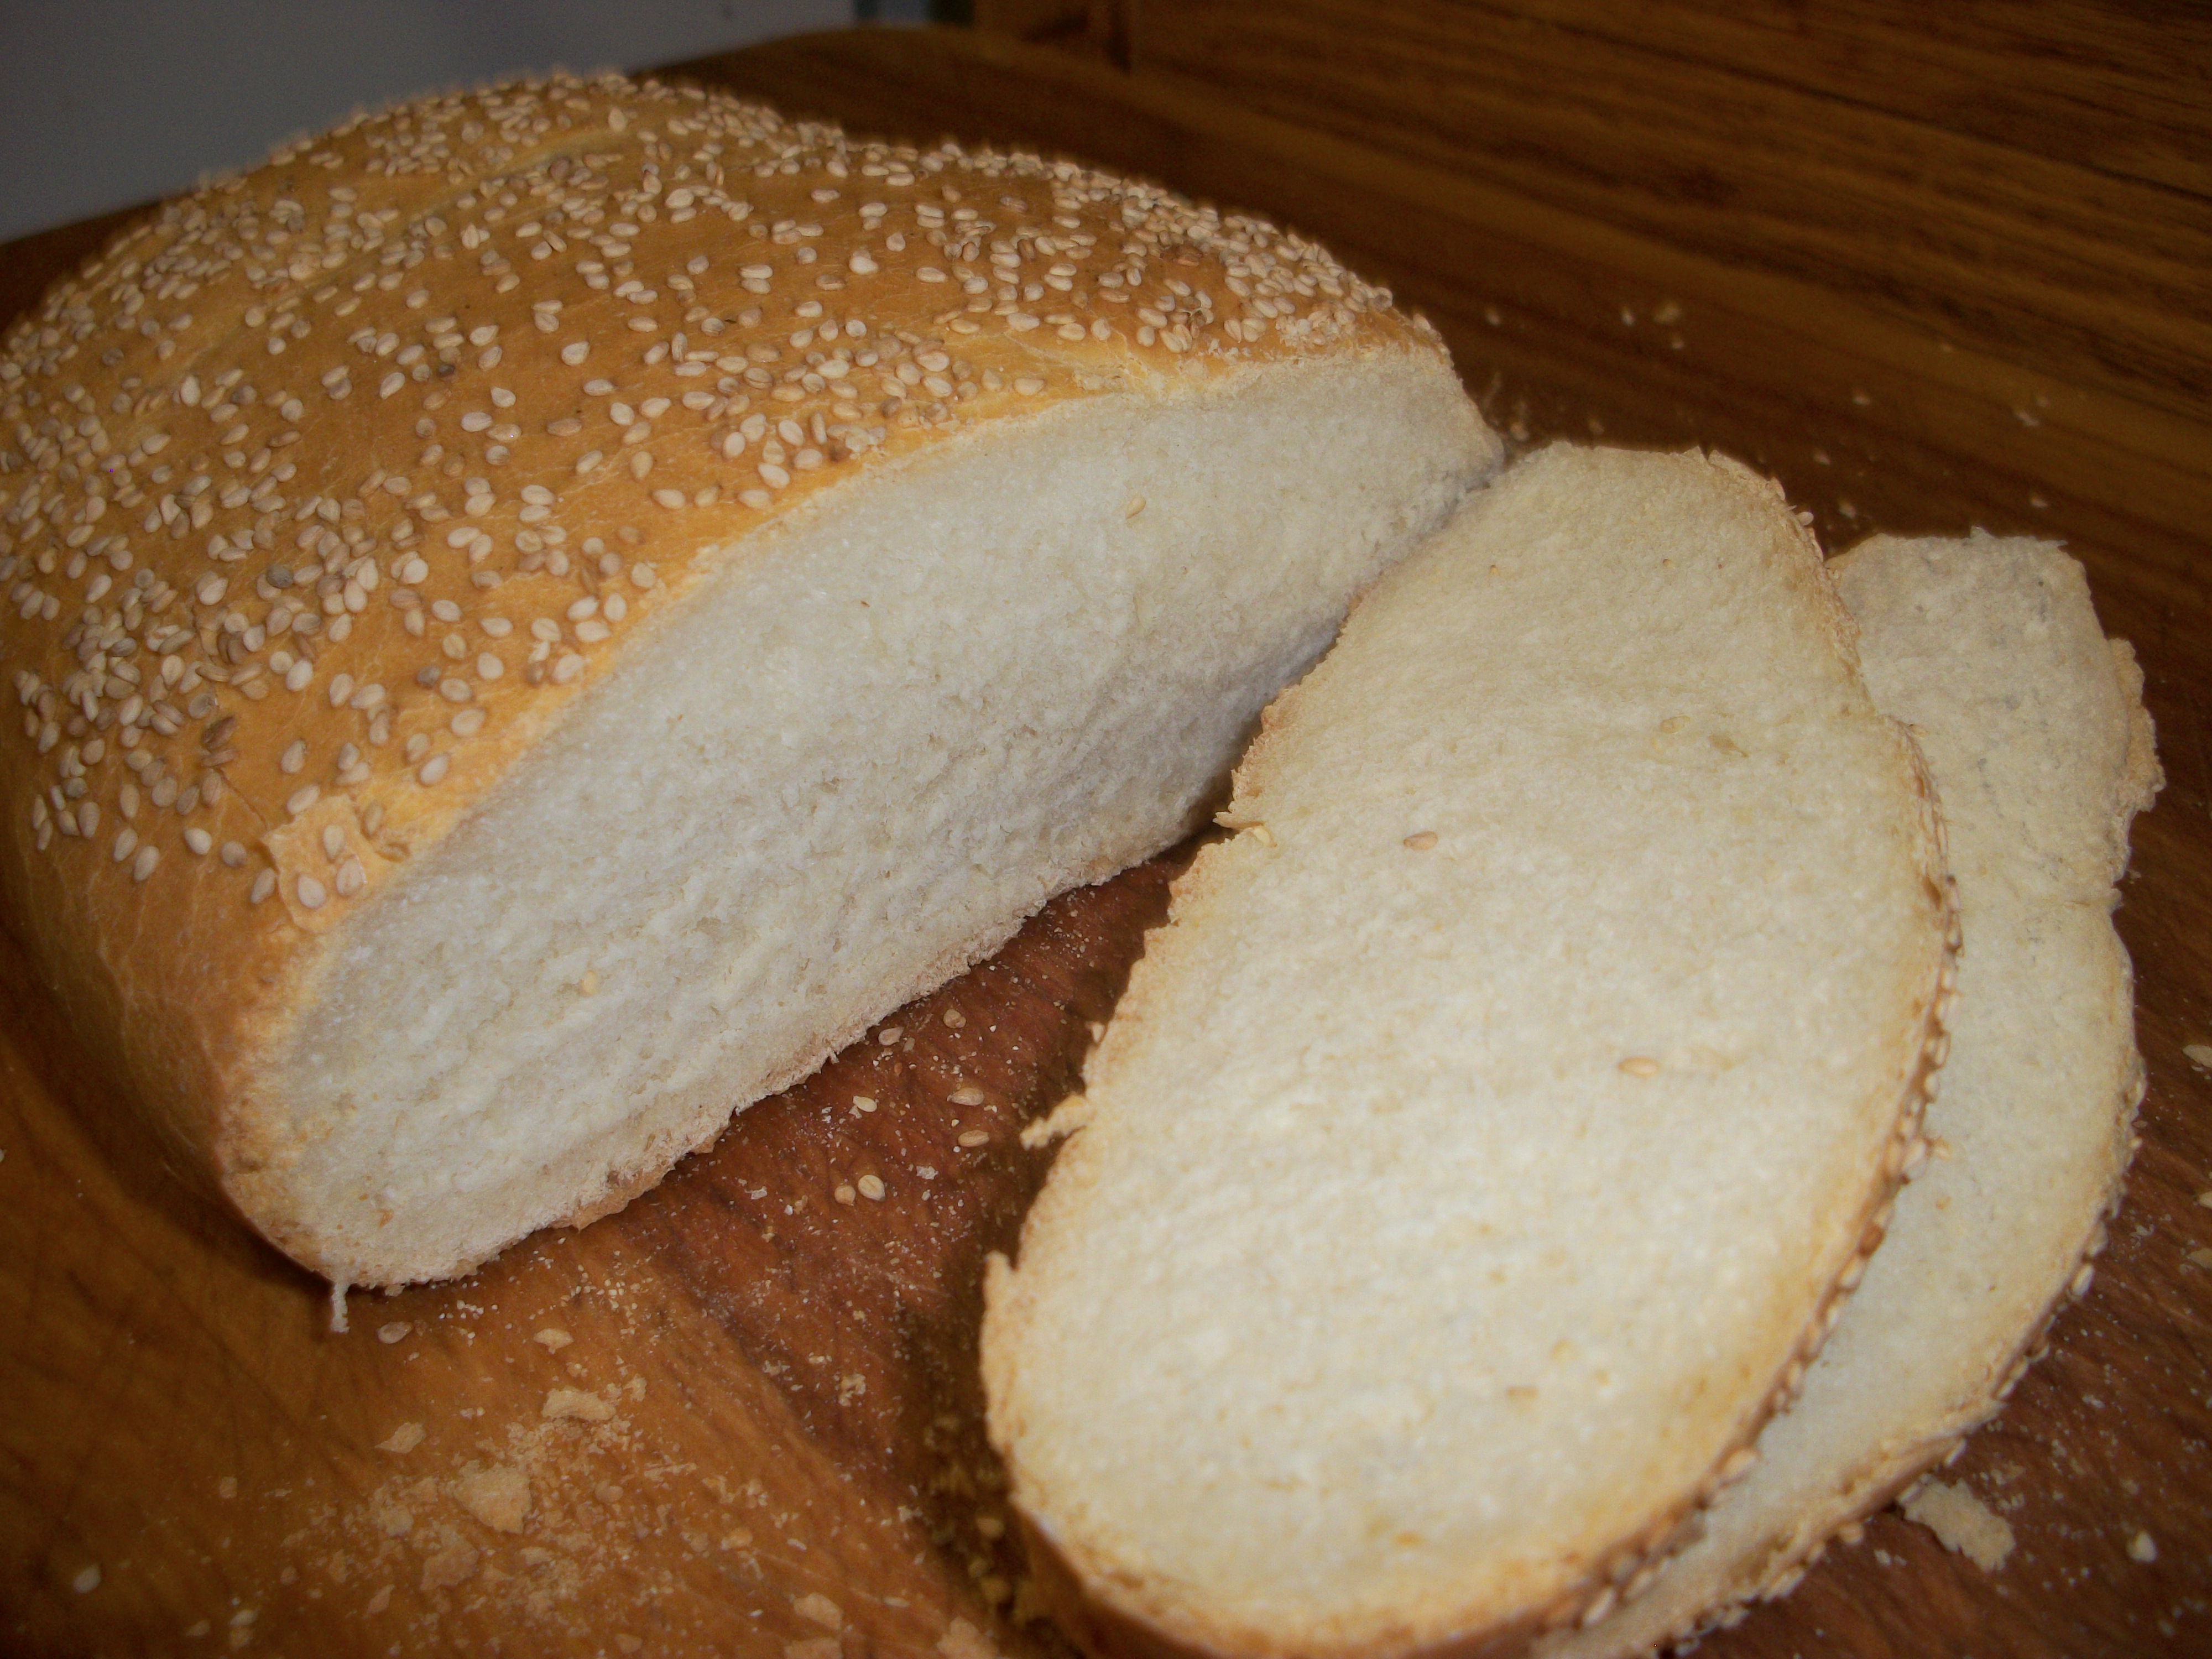
fougasse
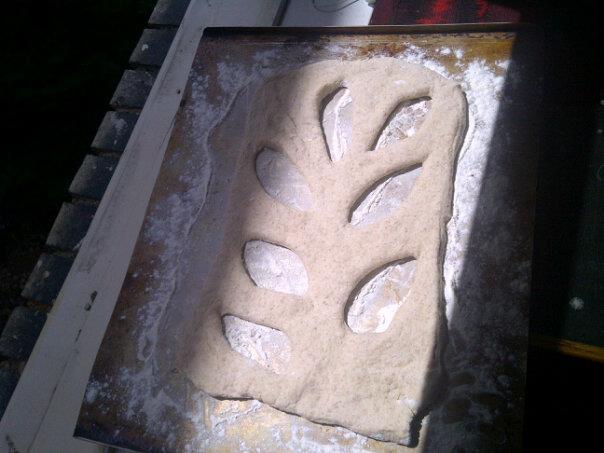
I began experimenting with French and Italian style bread methods over the years and finally decided to tackle something simple – which as usual, I had long presumed was complicated.  The French Fougasse is, and is not, complex;  actually it is roughly the equivalent of the Italian Focaccia – a famous & delicious leavened bread.

I used an Italian bread-making approach to start this French bread project, which requires a biga – basically a sponge (in French it is an Autolyse).  I mixed 1/2 tsp of dried yeast and 1/4 cup of warm water; and after it proofed, I stirred it into 1-1/3 cups of water and almost 3 cups of unbleached white flour.  This mixture I covered loosely & allowed to stand for 24 hours.  At this point the biga first stood for 24 hours (ideally); and thereafter remember that the longer this simple dough ferments, the more the flavor will develop.   4-6 hours will work in a pinch.This base will make several batches of bread.  You can also use baguette dough, or almost any kind of dough that you like to shape and bake a fougasse.

To begin, I measured a cup of the bubbly, sloppy, shaggy biga (which is how it should be) into a mixing bowl with:

1-1/2 cups warm water

1 cup rye flour

1/2 cup whole wheat flour

unbleached all purpose flour to make a sticky dough

1 generous tsp salt

1 tsp yeast, and

1 tbsp of good olive oil.

Place all the ingredients into a mixing bowl – if you’re using an electric mixer begin at low speed, gradually adding the flours and other ingredients until you have a dough that seems to be too wet – but still pulls away from the side of the bowl.  Allow to mix thoroughly for another 5-8 minutes until the mass becomes elastic and comes together.  At this point I removed the dough hook, removed the mixing bowl from the stand, and covered it with plastic wrap.

After 5 hours I scraped the dough from the rising-bowl and gently patted and encouraged it into a 13 X 9″ rectangle.  This rectangle I cut in half, and placed one half in the fridge in an oiled plastic bag.  You could make another fougasse, grissini (breadsticks), or pizza dough.

Extend your smaller rectangle of dough into an approximately 13 X 9 inch rectangle and make a few roughly symmetrical slashes, and a center top slash – so that it resembles an impressionistic leaf.  Coax the loaf out a little more on a floured peel, baking sheet or other surface.  Cover with plastic wrap and a kitchen towel, allowing it to ferment for another 45 minutes.  At that point briefly tease and play with the loaf until you have an creative, rustic leaf-shape.

In the mean-time heat your oven to 450-500F  – if you’re using a baking stone let the preheating continue for 25 minutes.  Now that your dough has completed the second and final rising, brush a little olive oil over the top, with flavorings if your wish (garlic, herbs, sesame seed, poppy, etc).  Ease the bread quickly into the oven, misting well with water.  You may also humidify the oven with a pan of boiling water – this will ensure a very good crust.

Let the loaf bake for the first 7-8 minutes, in the humidified oven, misting every 2-3 minutes if necessary; rotate the loaf  (or baking platform) front to back and continue baking for another 5-8 minutes.  Watch carefully to avoid scorching.  Dark brown patches are OK and lend character.  Let cool on a baking rack for 10-20 minutes before serving.

I have not yet completely decided whether I love pizza crust yeast or not.  I definitely do love the resulting pizza that comes out of the oven – and I have now experimented with the product 4 times, as of today.  Here is the brand that I used, which is not an endorsement.    http://www.pizzacrustyeast.com/new_pizza_yeast.html .  One of the ingredients that distinguishes this yeast product is sorbitan monostearate.

SORBITAN MONOSTEARATE … Emulsifier: Cakes, candy, frozen pudding, icing. Like mono- and diglycerides and polysorbates, this additive keeps oil and water mixed together. In chocolate candy, it prevents the discoloration that normally occurs when the candy is warmed up and then cooled down.

The above citation comes from http://www.becomehealthynow.com/article/dietbad/31/3/ .  The website appears to err on the side of caution, which I appreciate, but also does not say anything particularly negative about sorbitan monostearate.  I am still suspicious of long chemical names, so that is why I feel undecided.

My phone cam won’t upload a photo today, so please imagine your favorite super crunchy thin-crust pizza.

There is a difference between the preparation on the product-package, and the website listed above.  The product from the super market lists 3 Tbsp of olive oil among the ingredients.  I followed the directions on the packet.

I pre-heated my oven to 500F  for 25 minutes with a baking stone inside.  You can also easily use a metal baking sheet.

1-3/4 to 2-1/4 cups all purpose flour

1 tsp salt (I used a scant teaspoon)

1-1/2 tsp sugar

3 tbsp olive oil (or oil of your choice)

1 packet of pizza crust yeast

2/3 cup quite warm water.  That means between 120-130F.  Yes you read correctly.

I made this easy on myself & used a food processor to mix the dough.  Everything goes into the Cuisinart at once, and pulse the dough into a firm, soft, silky dough ball.  Hardly takes a minute or so.  It is now ready to use!  I have divided the dough in half & put some in the fridge for later use, simply popping it into a plastic sandwich bag.  You now have enough dough for a personal pizza, or an appetizer pizza for two.

Rub your hands with a little olive oil and begin flattening the dough into a rough disc.  Don’t worry about making a perfect circle, because that isn’t the point.  I you actually get a circle, good for you.  If you get a lop-sided oval or a trapezoid, all the better.  You can’t buy that in the freezer case, and it will show that this is homemade.  The dough will be surprisingly supple and yielding.  Drape the disc over the top of one fist and gently stretch, tugging lightly with your other hand and giving a quarter turn.  This will begin to shape the base as you repeat several times.  You can also hold one edge with one hand, and allow the weight of the dough to stretch itself, as you manage the stretch with your other hand.  Don’t worry if it tears or gets little thick areas.  Play with it, practice with it.  Start over and enjoy this new toy, if you’re a first timer.  Toss it in the air if you’re unafraid.  You can also use a rolling pin, or the tips of your fingers and tease it out on a flat surface if you don’t feel especially daring.

Gradually make an approximately 12″ diameter more-or-less flat bread and lay it down on your oven peel, sprinkled with semolina or flour – or on your baking sheet, sprinkled with semolina/flour.  Make sure that it can slide around and doesn’t stick to the surface.  If you follow my suggestions, your finished crust will be about 1/4″ , a little thicker at the edges.

Toppings:

I kept it very simple

2/3 cup very well drained tomato (I used home-canned plain tomatoes, crushed – you can also use fresh)

salt & pepper to taste

big pinch each of oregano and basil, fresh or dry

big pinch dried hot pepper flakes

small clove garlic grated or sliced paper thin

scant cup of your favorite cheese(s) – I used gruyer or mozzarella, or both

a couple Tbsp of grated, shaved or slivered Parmesan or Romano cheese

Add some shaved scallions or shallots, chopped parsley, chopped olives, a handful of arugula or anything else that you have, if you wish.  Today I also crumbled 1/2 an Italian style turkey sausage over the pie. I think the only rule is not to overload the crust, which will tend to make it soggy.  You want the crust to co-star with the flavors you top it with.  Crush the first five ingredients gently together & spread around the dough, to within 1/2″ of the edge, adding sausage or other protein if you have it on hand, and top over all with your cheese.  Some people like to brush a little oil around the edge of the crust, but you don’t have to.

Place your pizza into the screamingly hot oven and you will be surprised at how quickly it is ready. Maybe 10 minutes or less.  Give it a 180 degree turn after 5 minutes, and then start watching it like a hawk.  When you get some nice browning or charring on the crust remove from the oven and place immediately on a cooling rack to let the crust develop.  It is actually ready to serve, but it is also volcanically hot, so I let it cool slightly before slicing & serving.  You might never buy or order a pizza again in your life.

work table

work table

Here’s to the herbs, spices and flavorings that have become familiar to me over the years and which I love to use.  It’s easy in a city like Minneapolis to trek around and explore the street-party of international and specialty markets, which increases your odds of laying hands on some of these ingredients, some of which are not only exotic, but challenging to find (Minneapolis even has a stretch of Nicollet Ave, called Eat Street).

This is what God made the internet for.  Most of the below items that I found over the past 20 year period  are now often locally available.  I like shopping for them in person, because you don’t have to pay increasing mail/shipping costs, or tap your foot as you wait for delivery trucks.  Anyhow, combing your territory for these little treasure is always a much better adventure provided that you have the gift of time.

I’ll highlight more specialty ingredients sometime in the future (Africa, SE Asia, Central America), and if you think today’s list is exotic, just wait!

Asfoetida – a gum (tree) resin used in cuisines from India.  It is a penetrating flavor and aroma – only use  a small pinch and fling it into hot oil when frying pappadums.  It actually has an startlingly unpleasant scent before you cook with it, but it is also a key ingredient in authentic Indian-style cooking with an exciting taste.  For centuries, the non-physical and magical attributes of Asafetida have been- at the least -equal to to its health and aesthetic qualities.

Curry Leaf – another India item – I’ve used this herb both fresh and dried – just like the name says, it tastes like delicate curry spices.  Look for it in either form at your local Indian grocery, which is likely one of the only places you’ll find it.

Epazote is an Indigenous herb with a pronounced flavor, with many uses in Central American tribal cuisines, as well as Southwest US tribes.  It’s easy to grow (I’ve planted it in my garden many times) and I put it in various sauces and salsas, and it is a great addition to dry beans when you cook them, thought to have carminative properties.   Having the virtue of being an antidote or preventive to flatulence.  Easy to grow in your garden, which is good – I prefer using fresh over dried leaves when I have the choice.  It has an indefinable, almost chocolatley presence on the palate and in the nose.

Galanga Root – I have this fascinating spice in my kitchen in its fresh and dried state (both sliced root and in powdered form) as well.  It can be found in Asian markets in its fresh form, often labeled as Thai Ginger.  The taste is difficult to describe, but it really doesn’t taste like ginger at all.   Use it when you make Tom Ka, Thai Chicken Soup with Coconut Milk and Galangal.  Also known as Geing bot, and a couple of other perplexing names and spellings, it features regularly in Indonesian cuisine as well.

Grains of Paradise– A year or so ago I started searching for this peppery spice, and it took weeks to locate.  It is related to the African Alligator Pepper.  It has a spiky, pleasant flavor – unmistakably hotter than black pepper- and in the United States it found its way  into the brewing industry, for craft beer.  I later found out that this was one of the reasons it was scarce, as I began looking for it.  It has heat, powerful floral citrus and warm spice notes.

Gumbo File – This is not an exotic spice, since it is a unique Indigenous North American ingredient derived from finely ground leaf of sassafras.  This prominent ingredient in authentic Cajun and Creole cuisines around Louisiana has always been used by the Choctaw tribe (Five Nations) because of its thickening and flavoring virtues in cooking.  You can probably find it in the spice and baking aisle of your local supermarket.  It’s used as the name suggests in some preparations of Gumbo and is also sprinkled over a bowl of the stew at table to further enhance the flavor.

Juniper Berry – I love using this spice.  It does come fromf juniper and is generally fairly easy to obtain, because in addition to use in Native American cooking, it has been employed for centuries in traditional European kitchens as well, often to balance the strong tastes in game.  I always always always have this in my spice cabinet.  In cuisine francaise, it is a familiar companion to a strong burgundy:  A noble Rhône (Châteauneuf-du-Pape rouge, a good 1981 if you can manage it).

Keffir Lime Leaves– Prominent in SE Asian cookery, Keffir leaves are becoming steadily more familiar in the US.  I have found the dried leaf in my local co-op/natural food store.  You can probably also find it- fresh or frozen- in larger Asian groceries and supermarkets.  It adds a bright citrus fragrance to curries and stir fries and has numerous applications.

Yuzu Juice– Never heard of this before?  Neither had I.  And this amazing flavoring agent was a beast to find.  I couldn’t even find it in the Japanese section of one of our major Asian super-marts.  It is the juice of an inedible Japanese citrus fruit, used only in the juice or grated rind incarnations.  Yuzu is one of the components for traditional sushi dipping sauce (Ponzu), mingled with soy sauce.  Bartenders also have come to rely on the addition of yuzu to high-end cocktails to add an intriguing and deliciously aha-moment to beverages at the bar.  The taste is often described as the love child of lemon and tangerine.

Res El-Hanout – Apparently like many curries, each family & household commands its own concoction for Res El-Hanout (الحانوت رأس), sometimes with up to a dozen or so individual spices.   It is used in the Moroccan kitchen and throughout North Africa in one form or another.  I love cooking chicken with this spice blend and it will transform any ingredient into a unique dish to place on your dinner table.  This was another spice that took some searching on my part, until I rejoiced when I stumbled upon it in a Middle Eastern grocery four blocks away from me.  I was whooping madly inside my head.

Szechuan Peppercorn – I was first introduced to this deliciously prickly spice when I was living in Taiwan.  My landlord at that time taught me how to make Ma Po Dofu (an iconic Szechuan tofu and pork main dish); and when I first tried to make this recipe back in Minnesota, I had to find this ingredient.  I don’t believe you can make Ma Po Dofu without it, it’s that essential.  Part of the reason is flavor, and another is texture.  This small peppercorn, which is small and reddish brown, has a woodsy, flowery personality, and a sensation on the tongue that is somewhere between heat and a tannic-bite.  The crunchy kernel also retains its almost dinty character, even after you grind it and cook it!  It is fairly easy to find in your Asian grocery.

Smoked Salt – Fortunately this aromatic item has moved out of boutique kitchen stores and is becoming easier to buy.  It is usually made from sea salt (as opposed to mined) salt, and there are a number of interesting incarnations and applications.  I first was introduced to Hickory Salt about 20 years ago, and more recently there are new smoked salts in a number of forms.  This is a wonderful ingredient, and I love using it in the absence of smoked meats when preparing rice and beans, for example, or other recipes that feature smoked cured meats.  It’s especially great to use when making vegetarian foods, adding a pleasant smokiness, but omitting the smoked ham, bacon or turkey leg.  Include it in a rub for fowl, meat or fish, and vegetables, to give it a grilled depth.  Team it up with smoked paprika (available in both sweet and hot powders) to develop complex flavors.

Sumac – another ingredient native to both North America and Africa, and historically used by peoples in both continents for many centuries.  It’s used everywhere from the Bosporus and Mediterranean cuisines, to tribes around North America.  It’s versatility can be grasped when you realize that it can be made into a refreshing cold beverage (like lemonade) or in soups, baked and grilled dishes, adding a puckery, fruity tone.  In North America there are varieties of sumac that are inedible, and in fact poisonous.  If you forage this wild food, you must know the difference.  I bought mine at the Middle Eastern market.


cookbooks!

cookbooks!

Three years and three months since I started this blog, there have been nearly 7,000 views, online including my various micro reviews of cookbooks- about five-dozen titles so far.  It’s actually one of my favorite subjects, and I have published some 5 or 6 previous cookbook gazetteers over the past few years.  I haven’t counted how many volumes I have in my kitchen library, but it’s possibly a couple of hundred.  Here are a few more lucky finds, often found second-hand.  Believe it or not, I have found unused, $40 titles seconded for $3.99 in local bargain and thrift stores – or estate sales.

For new readers, I’ve been using this basic index framework for a couple of years, for lack of any other template.


Native

Native American Cooking; Foods of the Southwest Indian Nations. Lois Ellen Frank, 1991, Clarkson Potter/Publishers, NY.

ISBN -0-517-57417-9

This title demonstrates that a non-Native author can in fact create a quite decent book about Native foods, as a tribute rather than appropriation.  It’s creative and visually inspiring as well.  Many individuals and Native communities contributed to the book, and they are well credited at the very beginning.  Frank tackles some delightful and unexpected recipes, and backs them up with striking photos (she’s a photag).  If you come across this title, grab it.

Colonial

The Food of Portugal

Jean Anderson, 1986, William Morrow and Company, Inc, NY.

ISBN 0-688-04363-1

I’m including this richly turned-out book under colonial cooking because it manages to lend greater understanding to contemporary global fusion cooking.  In three hundred pages, the author authoritatively translates cooking traditions across hemispheres, from Macau to Brazil.  Portuguese cookery has benefited from- and likewise influenced foods and cuisines across the Americas, and beyond.

Groundbreaking publications (19/20Centuries)

Savoring the Seasons of the Northern Heartland

Beth Dooley and Lucia Watson

Knopf, NY 1995

ISBN0-679-41175-5

Many Minnesotans, especially Minneapolitans, will recognize these authors.  I was fortunate to cook at Lucia’s restaurant in Minneapolis around the time this fine cookbook was published, and it was and is a marvelous piece of work because it is a one-stop celebration of seasonal cooking, upper mid-West heritage (including Native traditions).  At the time of printing most local and seasonal cuisine was confined to vegetarian or other alternative cafes.  We emphasized cooking locally and seasonally at The New Riverside Café, for example in the 1980s.  This cookbook is endlessly captivating to read, with a homey layout and deft writing.

Lucia’s restaurant just received James Beard Award recognition this past month, which gives you some idea of the quality of the food and service at this excellent establishment.  Congratulations, Lucia!

Classic American

‘cookin’ country cajun: Basic Acadian Cooking from the True Acadian Country of Louisiana.”

Bobby Potts, 1989, Express Publishing Co

ISBN 0-935031-40-5

I have a Louisiana cookbook (by renowned chef Paul Prudhomme – which I have previously reviewed) that I’ve relied upon for 20 years.  However, I feel very fortunate to have stumbled on this startling, slender paperback of only 64 pages.  Thinner than a slice of bread, this guide is packed from floorboard to rafter, and front to back, with visually stunning photos and authoritative information and recipes from Cajun country.  I haven’t looked to see if more are available online, but if you can, get ye a copy of this little treasure.

Comprehensive Cuisine

Amana Colony Recipes

Compiled by the Ladies Auxiliary of the Homestead Welfare Club

Homestead Iowa, 1948

No ISBN assigned, no publisher listed.

A wonderfully printed collection of sheer comfort food from the kitchens of the Amana religious societies.  Recognize the name? Refrigerators? Air conditioners?  Various household appliances?  Yup, that’s them.  The Amana cooking traditions are well known and loved, so it’s nice to see them represented in this benevolent book.  There is one index in German, and one in English, reflecting the cultural origins of this respected sect of Christianity.  While the recipe selections are the very picture of simplicity on the surface, any one of them would travel well to a starred restaurant.

Vegetarian

The book of Miso

William Shurtleff and Akiko Aoyagi

Autumn Press, MA, 1976

ISBN 0-394-73432-7

This handy volume is almost an expression of artisanal quality, just like the authors’ beloved fraternal twin:  The Book of Tofu.  I think I have had my copies for 25-30 years now.  I actually used to make homemade tofu at home for years. There is no aspect of Miso that these authors do not address.  It represents indispensible staple in the Japanese kitchen – and it appears in other Asian cuisines as well.  This is a fermented soybean paste, highly nutritious and a superfood.  Everything from soups to desserts is covered in this fine book, which is also by the way, macrobiotic.

Baking

Danish Home Baking

Karen Berg

Dover,1957

ISBN 0-486-22863-0

With a focus on sweet baked goods, for which Danish baking is justly  famed, you can find authentic approaches to every baked good imaginable.  The scattering of black and white photos in this modest paperback don’t prevent you from imagining these tantalizing products in color.  There is even a metric conversion chart in the back.

World Food

Traditional Venetian Recipes: Cuisine of the Serene Republic

Arsenale & Editrice, 2009

Verona, Italy

Another slim paperback, probably intended for English reading tourists, would be a wonderful addition to any bookshelf.  With fold-out front and back covers displaying charming watercolors and characteristic food lore, this tribute to the cuisine of St. Mark shows the amazing intersections of east and west.  Marco Polo lived there, and I’m sure he must have had many of these distinctive dishes that make Venetian foods so memorable.

Reference

Schott’s Food & Drink Miscellany

Ben Schott

Bloomsbury, London, 2003

ISBN 0-7475-6654-2

Not exactly where to start.  The New York Times did a full review in 2004, Food Trivia Perilously Close to Usefulness”. (http://www.nytimes.com/2004/09/08/books/08grim.html?_r=0 )

That might actually be a good square one.  This miniscule book is tightly packed in tiny print and reads like a fascinating kaleidoscope of incomprehensibly interesting and unrelated information that most foodies would be happy to recite if they do not possess an internal information pause or edit button.  I haven’t read it through, but I think it’s meant for casual grazing and distraction.

Quirks

Rose Recipes:  Customs, Facts, Fancies

Jean Gordon

Red Rose Publications (who else?) 1958

I never imagined that anyone could squeeze almost 90 pages of recipes centered around that noble flower.  After a quick perusal, you may think of Gertrude Stein, “Rose is a rose is a rose is a rose.”  Syrups, ice cream, sweets, wine, soups, preserves, roses in ancient Roman food, theology, poetry and medicinals.  Rose omelettes, rose prayer beads, rose syrup, skin crème, and on and on.  It really is an unusual and intriguing study of an ingredient that western cuisines most often do not exploit.  Once many years ago I made a torte that was rose flavored – and our customers at the restaurant seemed to be enchanted by it.  However it was so time-intensive that I only made it one time.  I called it Gateau:  la Vie en Rose.  (regards to Mme. Piaf).

“God gave us memory

That we may have roses in December” – Margaret L. Woods

P1010831

Citty Katt procured a beautiful 5 pound duck, and we got together with Hortensia and Chris to sample a new duck recipe:  Duck with Sauerkraut, stuffed with Apples and Currants.  We all thought it was a very good recipe, and it went well with Wild Rice and a shaved vegetable salad.

This preparation can be found across continental Europe and east into Russia. The popular pairing of duck and sauerkraut can be found in French, German, Czech, and other national cuisines.  The richness of the bird is balanced by the tang of the cabbage; fresh, and dried fruits complete the sweet, sour and salty profile.

The shopping list is unbelievably short.  Duck, sauerkraut, garlic, salt & pepper, apples, raisins (I used dried currants) and apple cider for basting.

(recipe)

-a five-pound duck

-1 clove garlic, smashed into atoms

-salt and pepper to taste (I used a tsp of each)

-2 pounds sauerkraut

4-6 good cooking apples (we used Gala)

-1 cup raisins or dried currants

-apple juice or cider for basting, approximately 2-3 cups in all

P1010813Pat the bird dry and rub the minced garlic, salt and pepper inside and outside the whole duck.

P1010814Meanwhile, have your apples pared and quartered – or better yet, in eighths.  Mix the apples and raisins/currants together and stuff into the cavity of the bird.

P1010815We trussed the duck by using some wooden skewers and kitchen twine to close the cavity, followed by tying the legs together at the end; and finally take a good length of twine and binding the wings to the whole, making a compact, uniform package.  Place on a roasting rack

P1010817Drain the sauerkraut and lightly rinse away some of the brine, which is very salty.  Pack the sauerkraut  loosely around the base of the duck, and now you are ready to roast it.

P1010819Carefully empty a cup of apple juice or cider over all, and place in a 325F oven.  It will take 20-40 minutes per pound to roast.  We cooked the 5-pound bird for almost three hours, basting it with a cup of apple juice nearly every 45 minutes.

P1010826The bird is done when a meat thermometer in between the thigh and the breast reads about 150-155F.  Remove from oven and cover with aluminum foil , allowing to relax for 15-20 minutes.  The internal temperature will rise another 5-10 degrees.  Duck is often served pink or rare.

We carved the duck, conveyed it to the table on a bed of sauerkraut, with apple stuffing all the around the perimeter, family style.  If you can find any way to locate a reasonably priced duck at the market- or have a wild duck – give this recipe a try.  We gave it eight thumbs up.

P1010836

(photos C. Katt)

zhiishiib

100_1682In the past few weeks I  somehow located a couple of indispensable   ingredients to emulate  a fantastic batch of Corona de Pane Siciliana, yesterday:  ‘The Crown’, a typical Sicilian bread.  The ingredients in question?   A finely milled Semolina flour, officially designated  with ‘Tipo 00′, which is a hard wheat (high gluten) popular in Italian kitchens- including pasta production- but most especially for bread-making in Sicily.  Sometimes referred to as ‘Double Zero’ in English – governed under state agricultural standards – similar to an appellation.  And then- unbleached bread flour?- there are always happy surprises in this world.  This is one of them.

I finally found my 2.2# bag of Double Zero at Cossetta’s in St. Paul for $4.36.  The price is a bit steep for the weight, but I estimated that I can make eight loaves of excellent bread, saving about $40-45 at the cash register.  A commercial loaf of Semolina bread in Minneapolis last week was $4.99-5.99.  Mine cost about $1 of ingredients

The second ingredient I discovered was Gold Medal’s UNBLEACHED bread flour ($3.89 at Rainbow Foods, Uptown).  I have used and have loved bread flour over the years, because it does makes a discernible difference in raised breads.  But I tended not to use it because it is hard to find organic, or at the very least unbleached.   I will be going back to this product often, because I have tended to make a lot of my own bread for the past 35 years- plus, this unbleached flour gave a richer color -and I believe superior flavor- to the final loaf.  Together, these two ingredients alone contributed to a baking of Italian style bread that I could not  have imagined coming out of my oven.

Some other elements helped to make this successful:  Malt powder, fresh (compressed) yeast, a wooden bread peel and baking stone.  Also, this bread only has a first and second rising; no third rising!  However, if you administer a redundant 2nd rising, this bread turns out to be very forgiving. 🙂  In jazz there are no mistakes, there are only opportunities.

Here’s the basic recipe, which I adjusted only merely from The Italian Baker, by Carol Field ( 1985, Harper & Row)

2-1/2 tsp active dry yeast or 2/3 oz (18 grams) fresh yeast

1/4 cup warm water

1 Tbsp olive oil

1-1/2 tsp malt powder (I used Carnation Instant Malted Milk), plus 1/2 tsp sugar

1 cup water, room temperature

about 2-1/2 cups fine semolina flour (tipo 00, or double zero)

1 cup plus 1 Tbsp unbleached bread flour

2 tsp salt

1/3 cup sesame seed (use raw white sesame seed)

I used a counter-top mixer (Kitchen Aid) with a kneading hook attachment, and it worked beautifully.  In the mixing bowl, crumble the fresh  (or dried) yeast into the warm water and add the malt powder & sugar.  Add the remaining cup of room temperature water, and let sit for 10 minutes until the yeast has proofed.  Add olive oil to the yeast & water.

After you know the yeast has started working, combine your flours, and slowly begin to incorporate at medium low speed in your mixer.  When all the flour is in, increase speed to medium and slowly add salt, and knead with the dough hook until it yields an admirable, satiny, soft, sturdy dough.  This took only about 5 minutes with my machine.  Remove dough to a lightly oiled bowl, and allow to rise for approximately 1-1/2 hours.

Punch down and knead the dough very slightly and allow to rest, covered, for 5 minutes.  Now it is time to shape your loaves.  Now you can form Mafalda, Corona, or Occhi di Santa Lucia.  Here is how to make the Corona.  Divide the dough in half, and pat out each roughly into the shape of a rectangle- I think mine were about 4″ X 8″.  Now take your bench knife (or a regular knife) and tri-sect the rectangle, cutting the dough about 1/3 of the way toward the center.  Spread slightly apart, so that it resembles a three-toed bear claw pastry.  making Sicilian Bread again :)

I sprinkled my work-surface with a scattering of sesame seeds and placed the loaves on them.  Then lightly mist the top of the loaves with water and cover well with the remaining 1/4 cup of sesame.  I used a baking peel, sprinkled with a good dusting of regular semolina flour (or cornmeal) – so I put my loaves on the peel, covered it with plastic wrap, and covered that with a light kitchen towel.  If you are baking them on a baking sheet, instead of a baking stone, then place your bread directly on the baking sheet, which has been sprinkled with semolina (or cornmeal).  Allow to rise for 1-1/2 hours, or until double.

Preheat your oven to 425F for 20 minutes, with or without a baking stone, mist your bread with water & place  in the oven, misting them with water every 3 minutes thereafter, for the first 10 minutes.  Lower heat to 400F and continue baking for another 25-30 minutes.  Cool on baking rack, and wait until the bread is completely cool before slicing.

100_1680

click on any photo to enlarge.

N.B.  The original recipe calls for malt syrup, which I didn’t possess for this baking… so I punted.  I will shop soon at a home-brewers shop to source this uncommon ingredient.  I think of malt syrup as a softer, rich, complex ingredient, as opposed to the plain, hard sweetness of cane sucrose.

What an amazing Indigenous culinary herb I discovered yesterday at the Mexican grocer- a zingy, very fresh, pungent plant called Papalo – or in the language spoken by the Aztecs, Papalotl, which translates to Butterfly, perhaps because the scent of the plant attracts them.

As I was looking around the produce section I bumped into an acquaintance of mine & he was holding a bunch of this plant that I couldn’t identify.  It was so fragrant I could detect its powerful scent from 3 steps away.  At first I mistook it for Nasturtium leaves.  It packed that kind of spicy, sharp kick.  I asked my friend, ‘What IS that plant??’

He responded, ‘Oh haven’t you ever had this?  You should try it.  It’s called papalo.’  I started asking 20 questions – and he said that you can eat it raw – and I took a leaf that he offered me while we were standing in line for the cash register.  As the impact of the flavor sunk in, I realized that there were some familiar notes, and also some flavor elements that I can’t even describe – I grabbed a bunch & brought it home and started looking up info, and immediately started cooking with it.  I was crazy excited over this discovery.


I made fried squash blossoms rolled in  blue Native cornmeal, with a filling of rice & beans and carnitas (pork), flavored with this magnificent plant.  In some quarters it is called Summer Coriander, Bolivian Coriander, and various other names.  It grows wild throughout Arizona, Mexico and West Texas.  How have I never heard of this plant before???

Here are a few useful links with more information & recipes.

http://www.gourmetsleuth.com/Articles/Exotic-Herbs-Spices-and-Salts-639/papalo.aspx/

http://www.appalachianfeet.com/2010/05/07/how-to-grow-and-use-papalo-wrecipes/

http://nicholsgardennursery.wordpress.com/2007/09/27/papalo-or-summer-cilantro/

See if you can lay hands on this amazing herb which has been used for thousands of years by Native Peoples.


From the California goldfields in the 1840s and following, emerged a heritage recipe unique to the US – and the Judicial System.  If you want to read about a monstrous period in American history, please see http://en.wikipedia.org/wiki/California_Gold_Rush .

While this event resulted in the (conservatively estimated) deaths or massacres of 100,000 Native people, it also increased the population of San Francisco from a sleepy mission village- on the Ohlone Tribes ancestral domains – to a boom town of nearly 40,000 in 2 years.  Of course there was every crime and vice imaginable, from genocide to petty thievery.  Local communities and governments took justice into their own hands and doled out punishments of every description, whether they were proportional to the crimes or not.  So of course, many criminals met the hangman’s noose.  One town or another became so rife with lawlessness that it became known as Hangtown, due to the frequent, characteristic administration of capital punishment.  The origins of this dish emerge from legend, when one man was offered his Last Meal before walking up the scaffold.

Because of the turbo economy that was rising in California, and bouying the nation following the end of the Mexican-American War, the US went to the gold standard.  In those hedonistic gold territories, there was skyrocketing inflation- – can you imagine a hamburger for $50, a quart of milk for $75, and fresh eggs $20 apiece?  One unapologetic criminal apocryphally made history by asking for the 3 most expensive ingredients he imagined money could buy at the time:  Oysters, eggs and bacon cooked in a skillet together.  Presumably he met his Maker with his appetite fully satisfied by something like The $1000 Breakfast.

I first learned about this dish when I was reading Evan Jones’ amazing gastromical history, ‘American Food,’ which I briefly reviewed in this blog a couple of years ago.  If you want to try this very rich and delicious dish, even if you’re not planning to kick the bucket, I suggest putting it on your Bucket List.  You already know the 3 main ingredients – this is how I cook it.

For each serving –

1/2 dozen fresh shucked oysters in their liquor

3 strips of bacon

1-2 eggs

Also have on hand:

cornmeal or crushed cracker crumbs to bread the oysters (I used Blue Cornmeal today)

tabasco sauce

black pepper

a little cream to mix with the eggs

oil or butter for frying

Fry your bacon until brown and crispy and set aside on paper towels, draining most of the bacon fat out of a large heavy skillet.  Replace with some vegetable oil or butter and return the pan to medium heat while you bread your oysters.  First whisk an egg with a few dashes of tabasco sauce and season with some black pepper.  Dip your oysters into the egg, and then bread them with cornmeal, cracker meal (or flour or Panko bread crumbs if you like).  Brown the oysters well on all sides, and keep in mind that they don’t require much cooking time – probably just a few minutes.

Now beat your egg with a little cream, milk or water and pour over the cooked oysters and cook, stirring occassionally until the eggs are set but still softly scrambled.

-you can crumble the bacon into the cooking eggs

-you could cook each ingredient separately, making an actual omlette

-you could cook the oysters and eggs together and serve the bacon on top like a frittata

-you could look online and find out probably countless variations of this dish from the deconstructed-highbrow, to the shanty-town fry cook’s original hoosegow no-frills version.  However you decide to approach this little piece of culinary history, it’s easy, it’s truly delicious, and it’s fast…considering that it is actually slow food.

Well, I was hanging out with the Dubious Citty Katt and a dozen friends of a Sunday evening’s repast.  I made a big mess of greens – which are now plentiful and a dollar a bunch at the farmer’s market.  For $3 worth of greens, 2 cups of rice and 1 cup of dried beans, this dish is as easy as 1,2,3.

(photo courtesy Brian Foster)

Get you a deep cooking pot – I often use a cast iron Dutch Oven – with 2-3 Tbsps of olive oil, or other fat.

saute over medium heat:

1 heaping cup chopped scallions (or a medium onion)

2 cloves garlic, minced

2 bay leaves

1 jalapeno pepper, simply slit up the middle, but still whole

After these ingredients have become transluscent, add:

1 handful of fresh basil, torn (or 2 tsp dry)

big handful cilantro chopped roughly

1 tsp dried thyme

1 tsp black pepper

1 tsp Old Bay seasoning

1 tsp dried crayfish or dried shrimp powder

1-2 tsp smoked paprika

6-8 cups torn/chopped greens:  this could be any one or more of the following –

mustard, turnip, beet, chard, collards, spinach, kale (curly, red, Tuscan, etc), wild greens (lamb’s quarters, sour grass)

1/2 cup vinegar – I used cider vinegar

1-2 cups water, broth or stock

Cover the pot loosely & cook for 15-30 minutes over a medium flame.  It is well known that many people grew up with greens that were cooked for an hour or two, but I have always found that 30 minutes or less gives you plenty of flavor, retains more nutrients & fiber.  Stir from time to time.  Remove from flame & allow to cool.  Don’t worry if you have  what seems to be an excess of cooking liquid.

Beans

1 cup dried beans, sorted and washed

3-4 cups water

Soak the beans overnight – or if you want to use the quick method- bring to the boil over high heat, remove from heat and cover.  Allow to stand for an hour.  Make sure the beans are well covered with water & return the pot to a medium high flame and bring to a boil once again – lower the flame to medium low, cover the pot & cook for 30-45 minutes until you have achieved the Five Bean Rule:  Give the beans a quick stir & select 5 random beans; give each of them a little squish between two fingers, and if all five are soft enough to squish – the whole mess of beans is done.  If one or more is still a little starchy or dinty, give the beans a little more cooking time.  And if you need more cooking water, make sure it’s hot water.  And never add salt to beans until after they are done cooking, or they will be hard and indigestible.

Rice

for 12 people I used 2 cups of white rice

Rinse the rice in a sieve or in the cooking pot until it has given up most of its exterior starch and the water runs clear.  Add a tsp salt & 3 cups of water.  Bring to a boil, cover & turn the heat down and simmer for 15 minutes.  Fluff with a fork

Now comes the fun part:  Mix all your greens and pot liquor, beans & pot liquor and the rice in a big vessel – this is ready to serve right away, but it only gains virtue with a day or 2 in the refrigerator.

I’m trying to figure out why my entire posting disappeared – I will come back and recreate the recipe soon 🙂